Learn my simple, repeatable flock exam for spotting early signs of illness: behavior, eyes, beak, crop, feathers, feet, and vent. Perfect for backyard chicke...
The Cluck Loom
Poultry Mites and Lice: Identify, Treat, Prevent
Learn how to spot poultry mites and lice, confirm an infestation, treat your coop and birds safely (natural and poultry-labeled options), and prevent parasites from coming back.

Maggie Harper
Maggie Harper is a passionate backyard chicken keeper with over a decade of hands-on experience raising mixed flocks. Through CluckLoom, she shares practical advice on coop building, flock health, and egg production to help beginners and seasoned enthusiasts alike raise happy, healthy chickens.
Published
October 22, 2026
Last updated
October 22, 2026
If you have chickens long enough, you will eventually have the itchy week. Hens start doing that frantic scratch, you notice rough feathers, egg production dips, and suddenly you are staring at a tiny speck on a white paper towel like it owes you money.
The good news is this: mites and lice are beatable, even in a small backyard flock. The trick is knowing what you are dealing with, treating the birds and the coop the right way, and sticking with a schedule long enough to break the life cycle.
Mites vs. lice: what is actually on your chickens?
Both are external parasites. Both can make your birds miserable. But they behave differently, and that changes what works.
Chicken lice (chewing lice)
- Live on the bird all the time.
- Feed on skin debris and feather material (they do not suck blood).
- Often easier to spot during the day because they stay on the chicken.
- Cause irritation, broken feathers, poor condition, and can reduce laying due to stress.
Mites
There are multiple mites that bother poultry, but the big backyard troublemakers are:
- Northern fowl mite (Ornithonyssus sylviarum): often stays on the bird, especially around the vent and under the tail.
- Red roost mite, also called poultry red mite (Dermanyssus gallinae): hides in cracks and crevices of the coop during the day and feeds on birds at night. This one is famous for causing nighttime restlessness and anemia in heavy infestations.
Mites can cause feather loss, pale combs, weakness, and in bad cases, anemia from blood loss.
Signs your flock may have mites or lice
Some birds react strongly even to a light infestation. Others quietly suffer until you happen to pick them up. Here is what I watch for:
- Excessive preening, scratching, head shaking, or “nervous” behavior on the roost at night
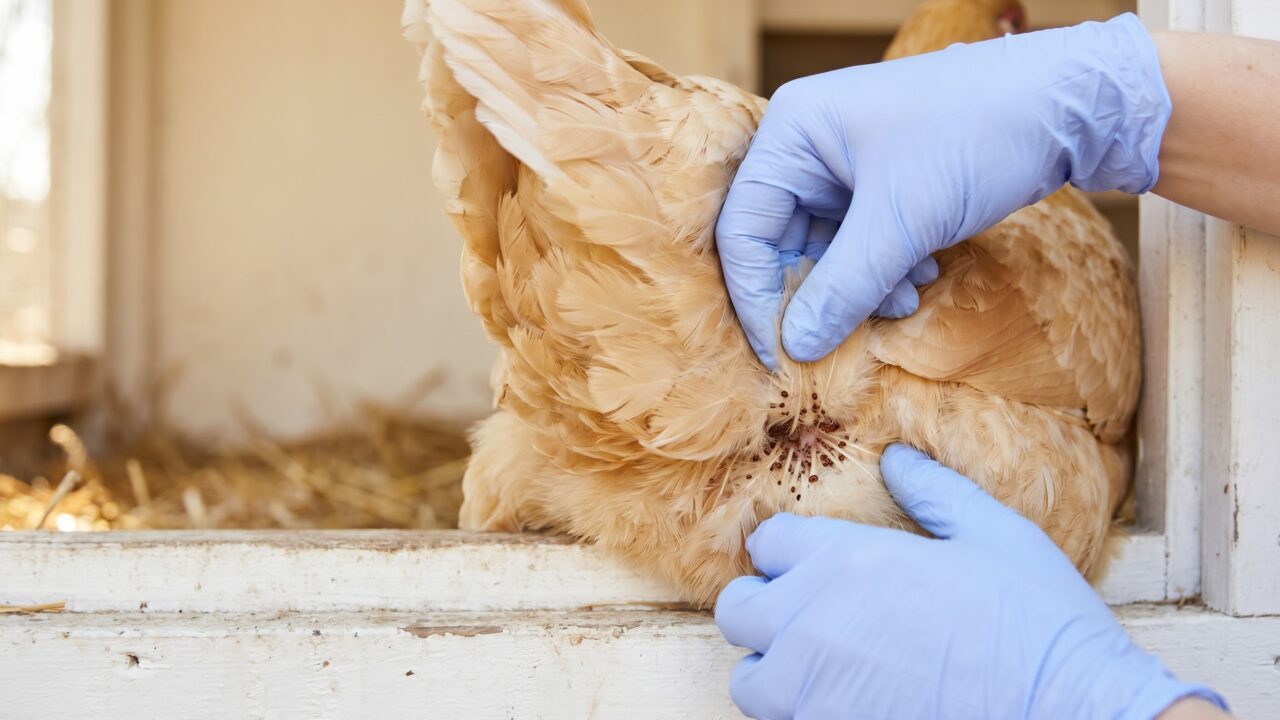
- Dirty-looking vent feathers or buildup near the skin
- Ragged feathers, broken shafts, bare patches, or a dull coat
- Egg drop without another obvious reason
- Pale comb and wattles, lethargy, weight loss (more common with mites)
- Scabby skin from constant irritation
- Grey, black, or tan specks moving on the skin or feather bases
If you see pale combs plus weakness, treat this like a priority. Parasites can tip a bird over fast in heat, cold, molt, or after another illness.
How to check your chickens and coop
1) Pick the right time
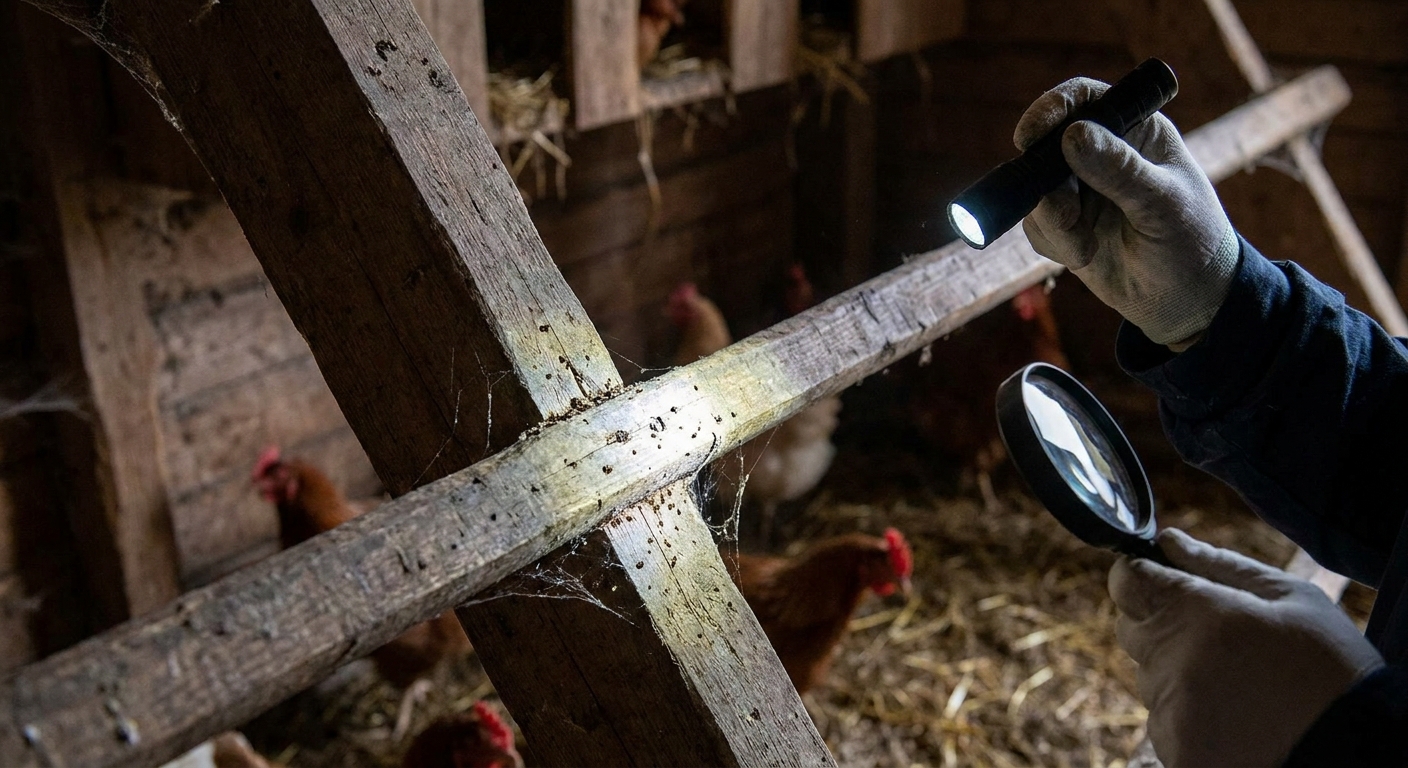
For lice and northern fowl mites, daytime checks work fine. For red roost mites, do a night check with a flashlight, because that is when they come out to feed.
2) Do a quick body scan
Hold your hen securely and part feathers down to the skin in a few key zones:
- Vent area (under the tail)
- Under the wings
- Back of the neck
- Along the breast
You are looking for movement on the skin, tiny crawling insects, and clumps of debris at the feather base.
3) Look for eggs and “gunk” at the feather base
Lice often leave tiny, rice-grain-like nits cemented to feather shafts, especially around the vent. They can look white, tan, or pale yellow depending on lighting and how fresh they are. Mites more often leave irritation on skin, and sometimes dark specks or staining around the vent area.
4) Check the roosts and cracks
Use the flashlight to inspect:
- Roost ends where they sit in brackets
- Under roost bars
- Corner seams
- Nest box edges
Red roost mites love tight cracks. If you wipe a crevice with a damp white paper towel and see reddish or rusty smears, that is a strong clue you are dealing with blood-feeding mites.
What not to do
- Do not treat only the birds if red roost mites are involved. You will feel triumphant for a week, then get reinfested from the coop.
- Do not mix chemicals or “double dose” because you are frustrated. That is how birds get sick.
- Do not dust birds in a closed space where they and you inhale clouds of powder.
- Do not assume every itch is mites. Feather picking, dry winter skin, and molt can look similar. Confirm what you are treating.
Treatment plan that clears infestations
I like to think of parasite treatment as a three-part job:
- Treat the birds
- Treat the coop
- Repeat on schedule to break the life cycle
Key principle
If you only do one pass, you are mostly killing what you can see today. The real win is getting the hatchlings too. That is why follow-up matters even when the flock seems calmer.
Step 1: Treat the birds (supportive and “natural” options)
Natural methods can help for mild cases and are great as support, but they are not always enough for a full-blown mite situation.
Dust bathing support
Make sure your flock has a dry dust bath area. You can offer plain dry soil, or a mix that stays fluffy and dry. The key is that it stays dry. Damp coops and damp litter do not cause mites and lice, but they can make infestations harder to control and birds less comfortable.
Manual cleanup for heavy vent buildup
If a hen has crusty vent feathers, I trim dirty feathers and gently clean so treatment can reach the skin. Be calm, be quick, and do not chill the bird.
Botanical sprays and essential oils
I am cautious here. Many essential oils can irritate skin and respiratory systems, and chickens have sensitive airways. If you use any botanical product, use one specifically made and labeled for poultry, and follow the label exactly.
Step 2: Treat the birds (poultry-labeled products)
When parasites are established, a poultry-labeled insecticide is often what ends the misery the fastest.
- Poultry dust or spray products labeled for mites and lice: follow label directions for dosage, application, and retreatment intervals.
- Many poultry products are permethrin-based (common in some regions), but availability and legal use vary by country, state, and even by whether you have laying hens. Always follow your local rules and the product label.
- Pay attention to egg guidance if the label includes it, and follow it exactly.
Important safety note: use only products labeled for poultry, and never use dog or cat flea and tick products on chickens. Some ingredients that are fine for pets can be dangerous for birds.
Step 3: Treat the coop (where red roost mites lose)
For red roost mites especially, coop treatment matters as much as treating the birds.
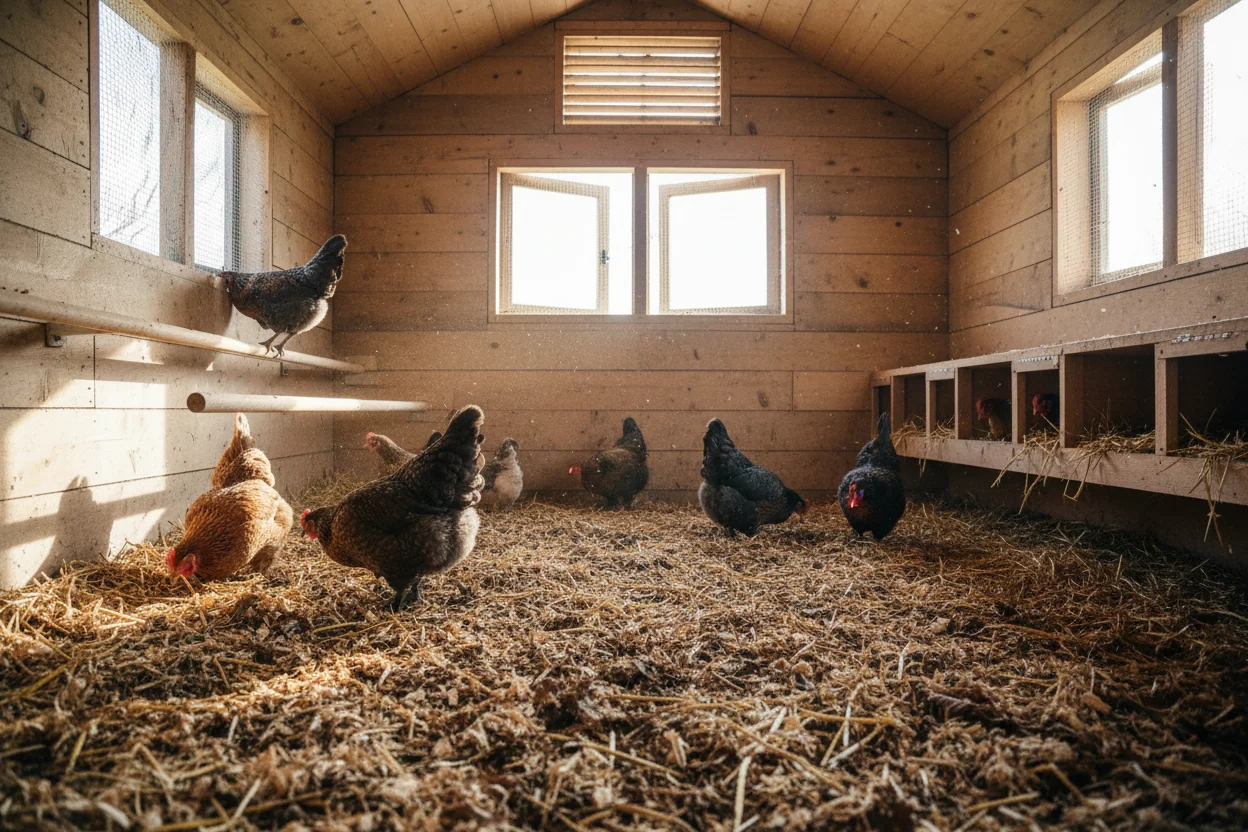
- Remove all bedding and bag it.
- Scrape and sweep roosts, corners, and nest boxes.
- Wash surfaces if you can, then let them dry fully.
- Treat cracks and crevices where mites hide. Focus on roost ends, seams, and nest box joints.
- Replace bedding only after everything is dry.
If your coop has lots of tiny gaps, consider adding removable roost bars and smoothing, painting, or sealing problem seams. Not glamorous, but it pays you back every summer.
Non-chemical options can help as add-ons: a steamer or careful heat treatment to blast cracks (follow equipment safety rules), replacing badly cracked roost wood, and switching to roost hardware that can be removed and cleaned easily.
Retreatment schedule
This is the part people skip because everyone wants to be done after one treatment. Unfortunately, eggs hatch. You have to plan for round two, and sometimes more.
- Day 0: Treat birds and coop.
- Day 7 to 10: Retreat birds and coop, or whatever your product label specifies.
- Day 14 to 20: Inspect carefully and treat again if needed.
Define “activity” during follow-ups: I count activity as seeing live, moving parasites on skin, feather bases, or in coop cracks. Old staining, dry debris, and glued-on nits may linger after successful treatment, so use your eyes for motion, not just residue.
Always prioritize the instructions on the product label you are using. Different actives, mites, and formats have different intervals, and some labels call for more rounds.
Special situations
Chicks
Young chicks are more vulnerable to anemia and chilling. If you suspect mites on chicks, act quickly and use a chick-appropriate product and method. When in doubt, call a poultry-savvy vet or experienced local poultry keeper to confirm a safe option.
Broodies
Broodies sit still for long stretches, which makes them a buffet. Check under the broody once a day if you are battling mites, and keep nesting material fresh and dry. If you treat her, make sure the product is appropriate around eggs and follow all label guidance.
Senior hens and anemic birds
If you see pale combs, weakness, or rapid weight loss, provide supportive care while you treat: easy access to feed and water, reduced stress, and consider discussing anemia support with a vet. Parasites plus dehydration or heat can spiral.
When to call a vet
Backyard parasites are usually a DIY fix, but I do not mess around when birds look truly unwell. Bring in a poultry-savvy veterinarian if:
- A bird is collapsing, too weak to stand, or breathing hard
- Comb and wattles are very pale, or you suspect severe anemia
- Weight loss is rapid or ongoing
- You have treated with a poultry-labeled product as directed and still see live mites or lice after repeat rounds
- You are unsure what you are seeing and do not want to guess with chemicals
Prevention that works
Parasites are opportunists. Prevention is mostly about making your coop a terrible place for them to thrive.
Keep it dry and ventilated
- Fix roof leaks and water drips.
- Use ventilation that removes moisture without creating a direct draft on roosting birds.
- Replace damp bedding promptly.
Do quick monthly checks
Once a month, I do a simple routine: pick up two birds, check vents, peek under wings, and run a flashlight along roost seams. It takes five minutes and saves me from the “how did it get this bad?” moment.
Quarantine new birds
New chickens should be separated long enough to watch for parasites and treat if needed. Many infestations enter the yard via a new bird that looked fine for five minutes at pickup.
Wild bird control
Wild birds can carry hitchhikers. Keep feed in secure containers, clean up spills, and consider using feeders that reduce scatter if you have lots of sparrows or starlings visiting.
Make the coop easy to clean
This sounds unrelated, but a coop that is easy to lock down and easy to clean is simpler to treat. Removable roost bars, accessible corners, and fewer “mystery cracks” make parasite control so much easier.
Quick ID cheat sheet
| What you notice | Most likely | Where to look | What to do first |
|---|---|---|---|
| Rice-grain nits glued to feather shafts | Lice | Vent feathers, under wings | Treat birds, then clean coop |
| Birds restless on roost at night | Red roost mites (D. gallinae) | Roost ends, cracks, nest box seams | Treat coop and birds, repeat on schedule |
| Dark specks around vent, irritated skin | Northern fowl mites (O. sylviarum) | Vent area, under tail | Treat birds, clean coop, repeat |
| Pale combs, weakness, weight loss | Heavy mite load possible | Night check plus vent exam | Treat immediately and provide supportive care |
FAQ
Can humans get chicken mites?
Some poultry mites will bite humans, especially red roost mites when their preferred host is not available. You might notice itchy welts after coop cleaning. They typically do not complete their life cycle on people, but if mites are living in the coop or even in nearby structures, the bites can keep happening until the environment is treated. Treating the coop thoroughly and laundering clothes after coop work helps.
Why did my chickens get mites even though the coop is clean?
Clean coops still have cracks, wild bird visitors, shared equipment, and new bird introductions. “Clean” helps, but dry, sealed, and routinely inspected helps more.
Will diatomaceous earth fix mites and lice?
DE is popular and can be part of a dust bath or coop maintenance for some keepers, but results are inconsistent, and the dust can irritate lungs if it gets airborne. If you use it, use it sparingly, avoid creating clouds, and prioritize ventilation. For active infestations, many flocks need a more reliable, labeled treatment plan.
How long until my hens feel better?
With effective treatment, many birds act more comfortable within a day or two. Feather recovery takes longer, and egg production may take a couple weeks to rebound depending on stress, season, and molt.
My one-weekend reset routine
If you want a simple plan you can actually follow, here is the rhythm that has saved my sanity more than once:
- Friday evening: Night check with a flashlight. Confirm whether the coop has active mites.
- Saturday morning: Treat birds (label directions). Remove all bedding.
- Saturday midday: Scrape, clean, dry. Treat coop cracks and roost ends (label directions).
- Saturday afternoon: Fresh bedding, refresh dust bath, wash coop tools.
- Next weekend: Repeat treatment and inspect again. Look for live movement, not just old residue.
It is not the most charming part of chicken keeping, but it is one of the most satisfying. There is nothing quite like watching your hens settle onto the roost calmly again, like you did not just declare war on a microscopic enemy.